Followers

Monday, September 25, 2023

Look Behind You!

 Hello, Hello!  How's everyone doing?  We're good here.  Have some kittens needing homes due to a feral mama and her brood we're housing.  She's due to get fixed end of October, but she has 5 little babies needing a new place to live.  Garden clean up is in the works.  Putting the garden to bed is hard work, but very satisfying, especially if it's been a good year; and it has.  I'll be behind the sewing machine adding stock to my Esty store soon.  The holidays are on the horizon and I need to have a lot of doll clothes for gifts.  Gifts for children, and gifts for people that are children at heart.  Many of my customers are doll collectors.  Weather it's due to nostalgia from their childhood, or they just happen to have an antique doll that needs dressing; those customers prefer the vintage style of the clothes I create.  Child or child at heart, I got it covered.

I can understand the attraction.  I too have dolls from my childhood.  Being 56, those dolls are now bordering on antique, but definitely vintage.  I also have a few old, old dolls, around 80-100 years old, and they need clothes too.  I don't collect, these are just ones I use for models or am refinishing to find new homes.  Have to include a recent restoration in this post.  She's about 80 years old.  I'm guessing you can tell the before and after.  She's up for adoption to anyone interested.  She's $75.  


Vintage items are attractive, and in a practical sense, can be a really good buy.  They're really a great choice when it comes to small home appliances.  In some cases, large home appliances.  I know.  It sounds weird, but it's true.  At the risk of sounding cliché, things were just made better then.  My mom once told me people would know how long a couple had been married by the age of their appliances.  I guess the same can be said these days, but for an entirely different reason.  Appliances, then lasted way longer.  They were built to last longer.  

I was in an antique store a while back and saw a old Westinghouse stove similar to the one below.  1928!  I was told by the dealer that the stove was still working the day it was taken out of the original owners house a week prior.

I myself recently lost my Iron.  That iron, purchased at Walmart and from a allegedly reputable company, gave me fits from day 1.  Being a seamstress; especially one who has a shop needing stocking, I needed an iron that would be a work horse.  This one wasn't.  It gave out after only a few years.  I know I could have returned it right after I bought it, but I didn't have time.  I needed an iron. So when this iron went out I knew I wanted to look vintage.  I found a vintage GE steam and dry iron made in the 1970's.  I've had it now for 14 months and it's been wonderful!  It cost me $26.  I did pay for priority shipping because I was in the middle of a custom order and was on the clock, but even that only made my total, taxes and everything, about $45.  This iron is one purchase I know I don't regret.

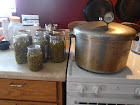
I used my grandmothers pressure canner, manufactured in 1946, up until this year.  This year I noticed a small crack in the bottom.  This makes it unsafe to use as a pressure canner.  77 years old!  I still have it though.  Cant bring myself to throw it away.  


The vast majority of my cookware is cast iron.  I have a few new pieces, but prefer the old pre 1960 pieces.  In a side by side comparison, the older cast iron seasons easier, and is lighter than it's modern day counterpart.  Not to mention I love the history behind each pan/pot.  To get these sometimes means restoring them from a rusted clump, but this isn't too hard.  Many times a good scrub with vinegar and 0000 steel wool does the trick, but for really bad ones you can put them in your oven and set your oven to the self cleaning mode.  Let the cleaning mode run it's course and you'll remove a good as new pot that just needs re-seasoning.  While most of my cast iron is around the 1920-1940 era, I do have a couple that are late 1800's.  Those were my great great grandmothers.  I cherish those.  The piece seen below was a mess of rust.  I restored that one using electrolysis.  An engineering friend helped me with that one.  Basically it was submerged in salted water and a current was run through the water.  The rust followed the current away from the pot.  Not sure of all the scientific particulars, but that's the jest.  I then washed and seasoned the pot.  This pot is actually a humidifier.  


I'll find vintage cooking utensils; knives, spatula, ladle's at thrift stores that hold up better than current "high quality" brands.  My washing machine is an older gear driven machine.  Makes it easier to repair if needed, and runs great. 

The benefit of looking to vintage brands is the opportunity to get a product that works better at the same, if not lower, cost.  I'll tell you there isn't one vintage item I own that I regret purchasing.  Plus I love the idea of giving something old a new life.  

Do you have any favorite trinkets?  I'd love to hear about them.  

Saturday, September 23, 2023

The power of DIY cooking.

 Good afternoon everyone!  

Today's topic is one near and dear to my heart.  It's something I, and almost everyone else is contending with in our world; How to make do with higher food prices.  I've waxed philosophically about watching for sales, gardening, canning, bartering, shopping mark downs, and cooking from scratch.  All of these are amazing skills you can use to help you not only make do, but come out on top when prices hit the roof.  I wanted to dive in a little more to the scratch cooking, if I may.  What I'd like to show is how, not only are there savings in cooking from scratch, but there's a greater degree of control in what is put in our families bodies.  It's healthier!  

So with that thought in mind, I looked up a few items on the Walmart webpage.  These are Walmart brand items.  I want to price compare the Great Value brand, which is usually the least expensive, with what I spend making that same item at home.  The savings is more than just a few pennies.  The cost of ingredients I'd use to make this at home comes from Walmart's site as well.

Shall we begin:  Great Value Biscuits: Ingredient list

Enriched Bleached Flour (Wheat Flour, Niacin, Reduced Iron, Thiamine Mononitrate, Riboflavin, Folic Acid), Water, Palm Oil, Buttermilk, Leavening (Sodium Bicarbonate, Sodium Aluminum Phosphate, Sodium Acid Pyrophosphate), Contains Less Than 2% of the Following: Sugar, Whey, Salt, Sodium Caseinate, DATEM, Mono and Diglycerides, Enzyme

Could be worse.  In all the wordiness, I do see Flour, Water, Buttermilk, Baking soda/Powder, Salt, and Whey.  But I also see Palm Oil, DATEM, Mono and Diglycerides.  So still not as good as what you can make at home in my opinion.  Plus, this package contains 20 biscuits for the lovely price of $4.52.  That's .23 per bisuit

Compare To My Frozen Biscuits:  6 cups of Unbleached Flour (you can still use white; it will be a little cheaper.  You can also do half white and half wheat): 3 tsp Salt,  3 TBS Baking powder, 1 cup of Butter, 2 cups Milk. 

My recipe makes 27 good size biscuits.   The Cost of those 27 biscuits? $3.10.  That's .12 per biscuit.  That's almost half the price of the store bought.  To have 27 Great Value biscuits would cost you $6.10.  

That's a $1.42 savings!  My calculations are based on Walmart prices for standard sizes.  Should you choose to use Buttermilk, you'd add a little bit more, due to price difference in buttermilk and the addition of a pinch of baking soda; but not much difference.  These are incredibly easy to make.  My recipe is on my recipes page.  

In fact all of these recipes are included on my recipes page.  Have a look!


Great Value Chocolate syrup.  Cost is $4.18 if you buy the value size.  Which is the better price between the 24 and 48 ounce sizes. 


 First red flag is the High Fructose corn syrup, then more corn syrup?  Xanthan Gum? What the heck is Vanillin?  Chocolate syrup was one of the first things I began making at home due to my son's allergy to what we then thought was corn, but later found out it was any corn product grown in the standard industrialized farming method.  Organic Non GMO corn products caused no reaction.  


Compare to my homemade chocolate syrup.  Ingredients:  1 cup cocoa powder, 1 1/2 cups sugar, dash salt, 1 tsp REAL vanilla, and 1 cup hot water.  Makes 24 oz.  Cost to make: $1.69 for 24 ounces or $3.38 for 48 ounces.  While the savings isn't astronomical at only .80 ( not bad though) the homemade version is a much healthier alternative.  No ingredients where you need to look up the definition.  Plus I get the added benefit of knowing there isn't a trace of anchovies( gag) in my chocolate syrup.  Ways to reduce even this cost is to make your own vanilla.  Incredibly easy to do.  

HOW TO MAKE YOUR OWN VANILLA:  Buy 10 vanilla beans and 1.75 liter of Vodka or Rum.  I have mine in Rum.  Run a knife down the length of the bean, putting a slit in one side.  Submerge the beans in the vodka/rum.  Just stick them down in the bottle.  Put in a cool dark place and shake once a week.  Vanilla can be used in 6 weeks, but it's best if you can let it steep about 6 months.  Once you start using your homemade vanilla, you can just top off the bottle with additional vodka/rum.  I usually will pour off 2 ounces into a separate container, and then add 2 ounces of vodka or rum to my big bottle of homemade vanilla, and just let it keep on making vanilla.  No need to buy beans again for a long while.  Real vanilla at Walmart; their brand, is $5.98 for 2 ounces.  My homemade vanilla is .83 for 2 ounces.  That's a significant savings.  

Okay, last example lest I bore you to tears:  Great Value brand Hamburger helper.  I'll admit this one is hard to compare.  Mainly because the only ingredient our recipes share is the pasta.  I do have to buy pasta and that's where similarities end.  One box of their hamburger helper, which somehow doesn't have tomato in it, is $1.28 for one 5.5 ounce box.  I'd need 2 boxes to feed this crew.  That would cost me $2.56.  Plus look at the chemicals!  Yikes.  
My hamburger helper is 8 ounces pasta, 1 lb ground beef, one medium onion, 1 28 ounce can tomatoes, 1 tsp salt, pepper, and whatever spices strike my fancy.  Minus the ground beef, my hamburger helper comes in at $2.23.   While not a huge savings, it's a much healthier meal.  It also takes the same amount of effort to prepare.  I simply brown the ground beef with a chopped onion.  Add the pasta, salt, pepper, and tomatoes.  I fill the tomato can about half way with water and swish it around then add that to the pan.  I stir it all together.  Put the lid on and let it simmer til the pasta is soft.  That's it.  No mystery.  Also, since I grow my tomatoes, this is cheaper than the $2.23 I've calculated based on the price of a can of tomatoes.  Mine are pennies.  Watching for sales can make it even cheaper. 

The point of this post is to give an idea of how to save even more at the store by making your own.  I have way more recipes on my page and try to add new ones when I find them.  The savings for just these three items, not counting the vanilla, is $2.55.  If you do an equal comparison of the biscuit prices you're looking at a savings of $5.65.  What else can you buy that you couldn't before with a few more dollars in your pocket?  Think of the things you buy prepackaged at the store.  How much do you think you could save by making it yourself?  I'd hazard to guess it could be significant.  It's a huge way to save without ever worrying about a garden or livestock.  It's a huge savings without the added benefit of a sale.  It also has the benefit of feeding your family well.  

Check out my recipe page and see the things I make here.  Maybe some of them will be useful to you.  What are some things you make from scratch?  


Friday, September 15, 2023

STAIN REMOVER RECIPE!

   This is extremely good for baby clothes, but really, any clothes with food or grease stains.  I've used this recipe for set in stained clothes for years( ahem decades).  Set in meaning they were accidently dried, and therefore permanent.  

1 cup of liquid Cascade dishwashing soap- just your normal cascade liquid; doesn't need to be fancy.  1 cup of Clorox color safe bleach.  Mix these in a  gallon bucket with Very Hot but not boiling water.  Fill the bucket about 2/3 full of hot water.  Then add the clothes that need stains removed.  I like to set aside clothes until I've gathered enough to make this worth while.  Once added just let them sit over night or at least 12 hours.  Then dump the whole thing, clothes and all, in your washer and wash as usual.  You won't need to add more soap though.  Double check each item as you place them in the dryer to make sure they're clean.  Some really tough stains may need a second go. 

This won't remove red mud stains, rust, bleach stains, or ink(especially black marker).  

Tip for removing stains in general: treat them before they're dried.  Once dried these stains can be set in and hard to remove

Ink stains can be removed by spraying with hair spray before they have been dried in the dryer

Blood stains can be removed by soaking in peroxide; again before they have been dried

Grease stains can be removed with dish soap ground into the stain before washing.  

Friday, September 8, 2023

Beef Tallow


Putting up beef tallow this morning. Once cooled, this will be solid and white. This is very easy to do. Kroger had beef brisket on sale last week for $1.99 a pound. I bought two. I trimmed off as much of the fat as possible. I chopped it up and added it to my crock pot, with nothing else. Added the lid to the top, but tipped it a little to the side. Then I allowed it to cook, on high, for quite a few hours.  As this cooks the fat will liquify, and what's left will sink to the bottom.  This cooks until it's no longer bubbling. It will go from looking like it's boiling to a smooth surface with seeming no activity. At that point, the liquid is ladled through a strainer into warm jars. Wipe the rims with a clean cloth dipped in a little white vinegar. Add your clean lid and ring and let cool on the counter. As it cools it will seal. This fat is now clarified, and shelf stable. This fat would normally be thrown away as waste. Instead I get the benefit of the beef $1.99 a pound, as well as a cooking fat for $1.99 a pound. I also ended up with one quart of beef broth. Very little was wasted. What was left after rendering the tallow went to my dog as a treat over the next few days. This is getting the most out of everything I buy at the store. Waste as little as possible. I do not fry food. This will last us a long time. It makes great oven fries.  This can be used anywhere you'd use lard or another fat for high heat cooking.  

Also:  You can use any type of beef with separable fat.