2 cups all purpose flour
1 cup salt
4 tsp cream of tarter
2 cups water with food coloring adding in whatever color you want
2 T oil
Mix all ingredients together in a pan. Cook over medium heat, stirring constantly, until it forms a hard ball. I'll try to include more over the next few weeks.
Hobby Horse
What you will need
scrap fabric in your desired color or pattern
1 inch wooden dowel
yarn of choice- for mane
stuffing - you can use scrap fabric.
Bias tape- for the harness
glue on eyes- or if you want to embroider them, then go at it!
Felt for nose and mouth- or if you want to embroider them on, then go at it! You can also use yarn
Hot glue gun and sticks
Staple Gun and staples
Stain for dowel (optional)
First you want to choose your fabric. I used some scrap stretch denim I had on hand. Denim, Canvas, twill, etc; any sturdy fabric will do well. I put right sides together (that's the part that would be on the outside, the nice looking side). I drew out what could be termed as a horses head free handed on my fabric with some chalk. You can use anything to draw this. No one will see that anyway. Make it big enough where you will have a decent sized head. Mine was about 12 inches from crown of head to snout. Once you draw it out, cut it out.

Sew your pieces together just along the top of the snout from about the bridge of his nose to where his eyes would be. Use a 5/8 inch seam allowance.

Lay your horses head flat with the right side looking up at you. See below. Press it flat. Pin ribbon, bias tape, or anything else you are planning on using for a bridle all the way across. Sew in place close to the edge of each side of the "Bridle"

Now you will do the same for the cross pieces of the "Bridle" to finish it up. Place these at about the half way point between top and bottom of the horses head. Again, sew along close to the edge on both sides of the "Bridle"

See below and you can see what I mean by close to the edges of each side.

Turn up the hem on the neck about 3/4 inch on each piece. I zig zag stitched the fabric before I turned it up to make sure it doesn't fray.

Now pin every thing back together lining up the "Bridle" as much as you can. See Below. Set up the rest of the horses head using a 5/8 inch seam allowance. Leave the neck open.

Trim your seam to about 1/4 of an inch all around the head. I had the nose a little too pointed so I trimmed it to make it a little more square. See below.

Pinch the seam together and clip a little "v;s" along the seam on all the areas that curve. You can also use pinking shears if you have them. It will be a row of "v's". Don't cross the stitching line. That would be bad. Makes a hole in your horse.

Turn right side out and press. Lookie below! It's taking shape!

I have a good sized bag of fabric scraps that I used to stuff this little guy. You can use stuffing as well if you have it, but the idea for me was to make this without having to buy anything if I can help it. Kinda shape as you stuff to make it look less lumpy and more horsey. Make sure you get the stuffing down into the nose area and any other tight fitting places. You will stop stuffing when it is full to the opening of the head. Leave the neck free of stuffing.

Now for the hair! Ahem...mane. I have a large yarn needle and can add hair by pulling it through the fabric and tying it off. If you don't have the ability to do this, you can sew the hair onto the head with a needle and thread or glue it on. Use fabric glue if you do. To do it the way I do, first you thread about a 9 inch piece of yarn onto your large needle. Poke it into the horse head pushing the needle and yarn all the way through. Come back up thru the head. Leave a length of yarn sticking out of the head when you first poke thru, and then when you come back up that will be the second length of yarn. Take both lengths of yarn and tie them into a knot. Try to keep your "stitches" in rows moving from the center top of the head down on either side. It doesn't have to be perfect. It just needs to look like a head of yarn hair.

Once you have all your "Hair" in, he needs a hair cut. Trim the yarn pieces evenish.

I happen to have googly eyes left from a former craft, but you can use two buttons or even sew in eyes with embroidery thread or felt. You can also paint eyes on with fabric paint. I sanded the back of the googly eyes and, using a hot glue gun, glued the eyes onto the horse. I put glue on the horse and on the eye. Then smooshed them together.


To finish up I took a 1 inch diameter dowel and pushed it as far into the horses head as possible. Moving stuffing to one side as I pushed. I put the top of his head down on a table and pushed the dowel in. Then, using a hot glue gun, I ran a strip of hot glue on the inside neck and on the dowel. I squeezed the fabric around the strip of glue. Then on the outside, I took a staple gun that uses JT 21 staples and stapled the outside of the horses neck to the dowel, fitting the fabric around the dowel as I went. I covered the staples by tying a strip of red bias tape tightly around the neck wrapping twice before I tied it off. If you don't have staples, you could use small screws. The hot glue is for holding the horses head while you fasten it with the more secure fasteners (staples or screws). It won't last long other wise.

Here he is! Looks kinda "Bieberish" I guess". Oh! I forgot! I used a button for his nose and a strip of yarn hot glued to his head for his mouth. Also, You can opt to paint or stain the dowel. I choose to spray it with clear acrylic.

T-Shirt Yarn
Anyway, I know everyone has had this moment were you are going through your families clothes and weeding out what is good enough to wear, sell, or give away. Well that is all fine and good, but what do you do with t shirts that are faded, holey, and otherwise ratty. Not good enough to keep, sell, or give away. Then there is the ever present guilt now associated with throwing things into the land fill. Bad, Bad, Bad. Well, for those of you who suffer from this and want to know what you can do about it, I might have an answer. Re purpose those t shirts into something else. Here is what I do:
THIS
 Use to be these:
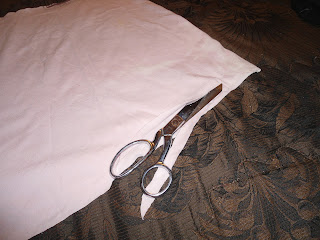
 This is what I do while I am watching TV or just vegging on the bed after working in the garden etc. I can't do this whole pile at once. It makes my hand a little sore after a bit mainly because I am left handed using right handed scissors. See what I have to put up with in this right handed world? Just not fair....anyway, I digress. First of all you want to lay the t shirt flat and cut off the hem at the bottom. Use the hems for tomato tie ups if you want to or something to that effect, but they are no longer needed with this shirt.
 Then you want to cut the bottom half of the t shirt off. Some people want to make sure they cut off below the decal, but I don't care if it is there. It will add a bit of color to my next project so I keep it.
 Next you will cut the T shirt into strips coming to withing about a inch of the other side, but alternate sides to leave un-clipped. If you accidentally cut to far you can always tie it back on so now biggie.
 Now you can shred this bad boy all the way to the top and then roll it up into a ball, stretching the material as you do so.. This is how I learned how to do this from another site. Wish I could remember the site, but here tis. This does work, but I prefer the lazy method and that is to just cut the hem off and then begin trimming from the bottom to the top around and around until I run out of shirt. Like this:
Kind like peeling an apple and keeping the peeling whole. That same idea. Once rolled up this t shirt material can be used where you would use yarn, just make sure you use a larger size needle. What can you make from something like this? Well here is a hot pad I made from an old t shirt of mine. My crocheting leaves a lot to be desired, but it's functional. This "yarn" also makes great tie ups for in the garden.

THIS


Kind like peeling an apple and keeping the peeling whole. That same idea. Once rolled up this t shirt material can be used where you would use yarn, just make sure you use a larger size needle. What can you make from something like this? Well here is a hot pad I made from an old t shirt of mine. My crocheting leaves a lot to be desired, but it's functional. This "yarn" also makes great tie ups for in the garden.

No comments:
Post a Comment